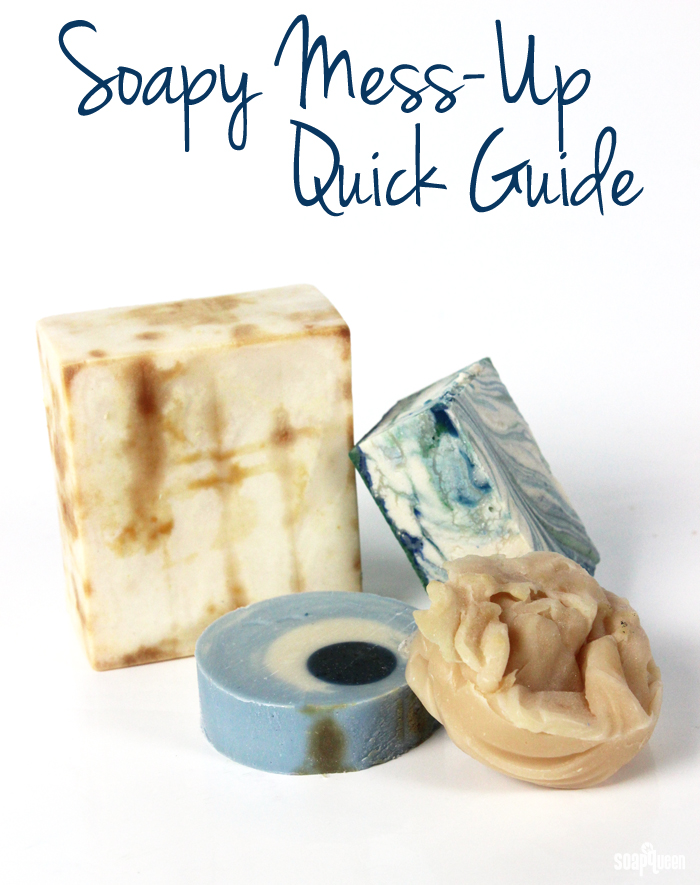
Soapmaking is an art form AND a science. It requires precise measuring of properly selected ingredients to initiate the saponification process. Temperature and time are also important in the chemical reaction between sodium hydroxide lye, water and oils. Because of its precise nature, mistakes are bound to happen. I have experienced plenty of soapy mess ups and still learn new tricks of the trade when soaping. Soapy mistakes happen to us all! Luckily, there methods to prevent and fix these blunders.
Below are some of the most common soapy mistakes, and ways to fix them. Many of these fixes include rebatching the soap, which involves melting the soap with a small amount of additional liquid. To see this process in action, check out this Soap Queen TV video. Also, check out the Tips & Tricks section of the blog to see a wide variety of in-depth posts about these soapy problems.
Lye Heavy Soap
When soap is made with too much lye, it is called “lye-heavy.” This means there is extra, free floating lye that was not made into soap during the saponification process. Lye heavy soap can be irritating when applied to the skin and should not be used or sold. Lye heavy soap is often crumbly or dry feeling. If you are worried about your soap being lye heavy, check out this blog post to test the pH using strips, cabbage or even your tongue.
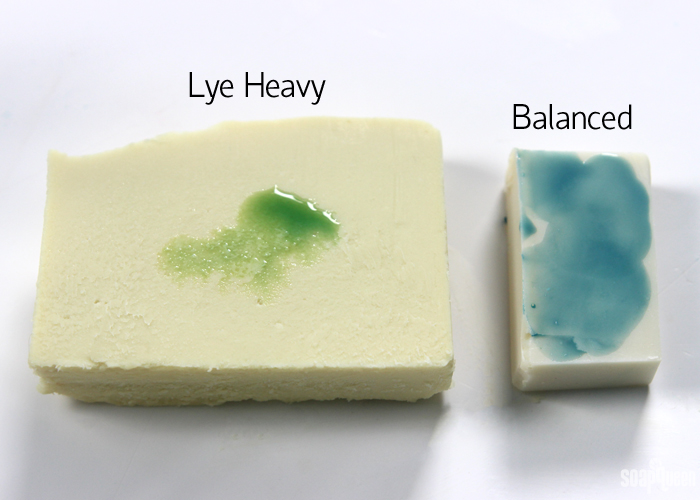 The soap on the left is lye heavy; the pH was tested using the red cabbage method shown in this post.
How to Fix it:
Once soap has gone through the saponification process, it cannot be reversed. But don’t throw your lye-heavy soap away! Lye heavy soap can be made into laundry soap. Clothes are not delicate and sensitive like our skin, and are not affected by the extra lye in the soap. In fact, soap with little to no superfat is recommended for use in the laundry. Click here to learn about how to turn your lye-heavy soap into usable laundry soap.
Soft Soap
For most recipes, soap needs to stay in the mold for 2-3 days. If after 7-14 days the soap is still soft, it is unlikely to harden. Soft, squishy soap can be caused by several factors. One reason may be that not enough lye was used in the recipe. If the soap does not contain enough lye, the oils will not saponify. Another reason for soft soap is there was not enough hard oils or butters (such as coconut oil, palm oil or cocoa butter). Soap made with only soft oils can take an extremely long time to unmold (such as castile soap). Too much water in a recipe can also result in a soft bar of soap.
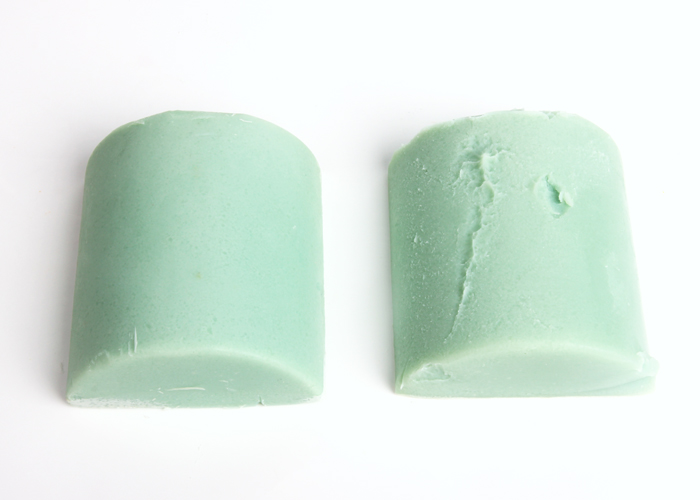 Adding sodium lactate to lye water helps soap harder faster. The soap on the right does not contain sodium lactate, while the soap on the left does.
How to Fix it: To speed up the unmolding process for an extremely soft recipe use sodium lactate in the lye water at a rate of 1 tsp. per pound of oils. Click here to learn more about sodium lactate. If the soap has stayed in the mold for 2+ weeks and is still extremely soft, it will most likely not harden. At this point the soap can be used as is although it will not last very long and the lather may be lacking. If too much water was used, rebatching the soap may help cook out the extra liquid.
If you’ve already made your soap and it’s not coming out of the mold, pop the mold in the freezer for 24 hours and then try to gently release the soap. Some soap can take weeks to unmold depending on a variety of factors so you may just have to wait it out too.
Cracking Tops/ Overheating
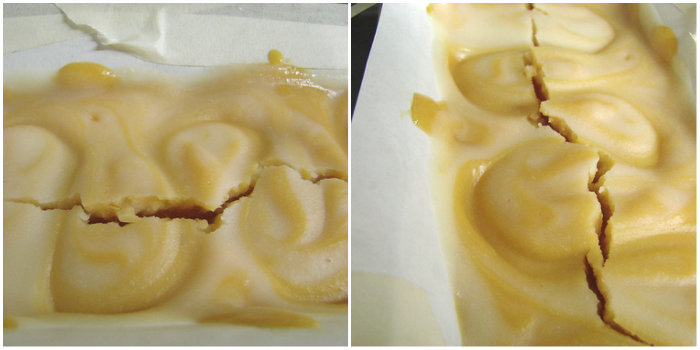
Soaping with high temperatures (140 °F and above) cause the top of the soap to crack. Heat causes the soap to expand, so much so that a crack can occur (shown below). This is much more likely to happen when the soap recipe contains a high amount of hard oils and butters, such as cocoa butter, shea butter and mango butter. Soap containing additional sugars (such milk) are also more likely to crack, as shown in the coconut milk soap below.
How to Fix it: When the top of the soap cracks, it may be possible to slice off the cracked section of soap. This will depend on the shape of the bars and design. You can alsso spray freshly-cracked-yet-cooled soap with rubbing alcohol, cover the crack with plastic wrap and gently rub the crack out. This minimizes the cracked look and helps adhere the two sides back together. Another option is to rebatch the soap. The extra moisture from the rebatch process may help create a smoother bar. Using cool soaping temperatures prevents cracking, especially when making milk soap. Placing the soap into the fridge or freezer can also help avoid cracks.
Incorrect Fragrance Oil Amount
An incorrect amount of fragrance oil leads to an over-fragranced or under-fragranced bar of soap. If an extremely large amount of fragrance oil is used, the soap could irritate more sensitive skins. Depending on the skin safety of the fragrance oil, you may have to turn the soap into laundry soap. Or, you might just have an over-fragranced bar. This will vary based on each fragrance and its specific usage rate guidelines. Luckily, soap that contains an incorrect amount of fragrance oil is often fine to use! Some people prefer highly fragranced soap, and other prefer fragrance-free products.
How to Fix it: The only way to add more fragrance oil to already made soap is to rebatch. If the soap if underfragranced, add more fragrance oil once the soap has reached the texture of mashed potatoes during the rebatch process. If the soap has been overfragranced, this is a great time to use any soap scraps or rebatch soap you may have on hand. Adding non-fragranced or lightly fragranced soap while rebatching will help the scent become more mild in the final product. To ensure accurate fragrance oil usage, the Bramble Berry Fragrance Oil Calculator makes the process easy! Check out this blog post for step by step instructions on how to use the fragrance calculator.
Too Much Colorant
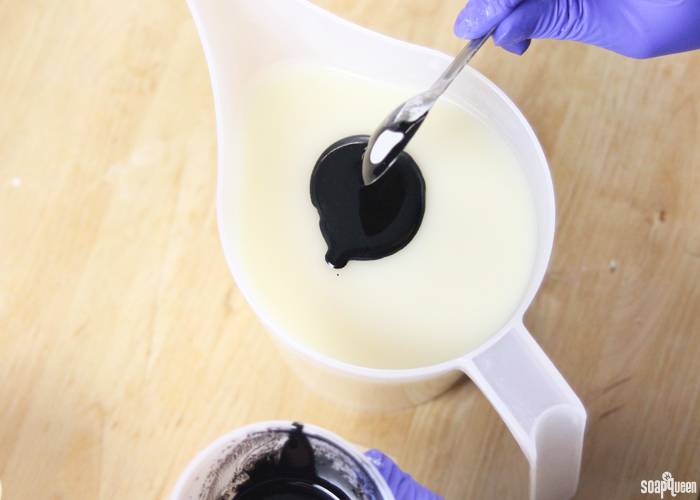
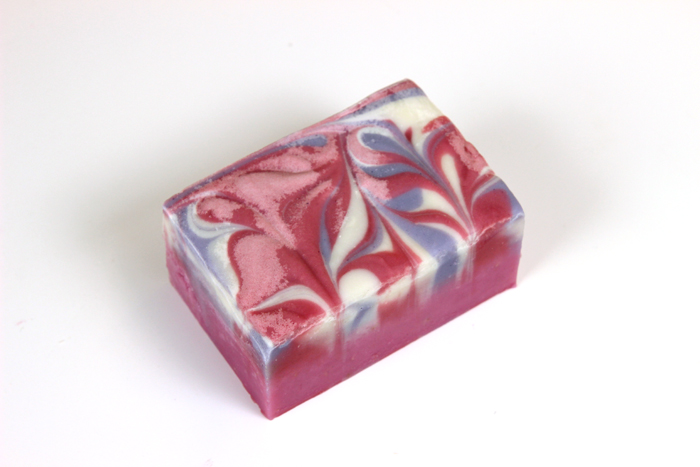
If too much colorant is used in soap, the soap may lather color. A little colorant goes a long way, especially when using black colorants such as black oxide and Brick Red Oxide. Soap that contains too much colorant is safe to use on the body, but could potentially stain wash cloths. In the Black, White and Gold All Over Cold Process tutorial (shown below), the black oxide gives the soap a slight grey lather. It’s totally harmless, but may be undesirable.
How to Fix it: If the soap has been made, the only way to ‘fix’ this is to chop up the soap into confetti or chunks and embed the over-colored soap into other batches of soap like in this confetti soap tutorial. Typically, a diluted colorant will help prevent over adding too much color. For cold process, add 1 teaspoon of oxide to 1 tablespoon of a carrier oil like Sweet Almond or Olive Oil and mix well using a mini mixer. Begin adding the color into your soap 1/2 teaspoon at a time until your desired color is reached. Adding the color in small increments will help avoid using too much colorant. For more information about coloring your soap (including information about melt and pour), check out this Talk it Out Tuesday: Colorants post.
Ricing/Seizing
Ricing and seizing are usually caused by fragrance oils. Ricing occurs when an ingredient in the fragrance oil binds with some of the harder oil components in the recipe to form little hard rice-shaped lumps (shown on the left). Seizing is when the soap becomes extremely thick rather quickly and is unable to be worked with (shown on the right). Check out the Soap Behaving Badly blog post for more information on ricing, seizing, acceleration and separation.
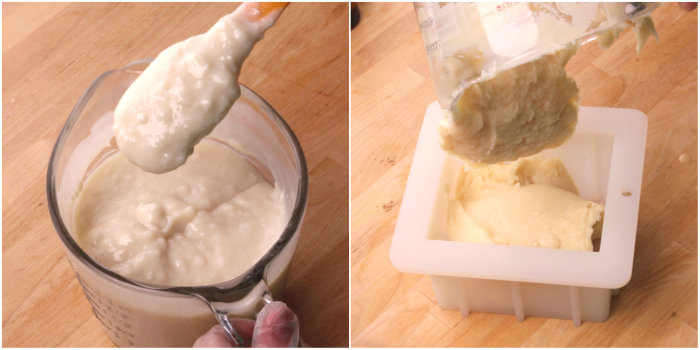 Ricing is shown on the left, seizing is demonstrated on the right.
How to Fix it: To avoid ricing and seizing, make sure your fragrance oils have been tested for cold process soap (good news, all Bramble Berry Fragrance Oils are thoroughly tested in soap!) Fragrance oils not meant for cold process soap are the most common reason ricing and seizing occurs. If you experience ricing, the lumps can often by stick blended out of the batter. When doing so, be aware that further stick blending may result in an extremely thick trace. Seizing is a trickier problem to fix. Once the soap has seized, there is no way to return it to a fluid texture. Just glop that soap in the mold and be prepared for an extremely hot gel phase; seizing and hot soap go hand in hand. If the soap is fresh (less than 24 hours old) the Hot Process Hero technique is great way to salvage your batch.
Glycerin Dew (aka: Sweating)
This problem is unique to melt and pour soap. Glycerin is a natural humectant, and is added to melt and pour soap during the manufacturing process. When melt and pour soap is left in the open, glycerin draws moisture from the air and onto the soap. The result is the appearance of moisture, tears, sweating or dew drops on the melt and pour.
How to Fix it: To prevent glycerin dew, allow melt and pour to cool and harden in the mold completely. Once removed, wrap the soap in plastic wrap immediately. This prevents the soap with coming in contact with the moisture in the air. If you live in a humid climate, a dehumidifier can be helpful.. For more tips on preventing glycerin dew, check out this blog post.
Air Bubbles
When stick blending, air bubbles can get caught within the soap batter. Air bubbles do not effect the quality of the soap, but it is an aesthetic issue. Soap containing air bubbles will have small lumps or bumps within the soap, as shown below. Read more about air bubbles in this blog post.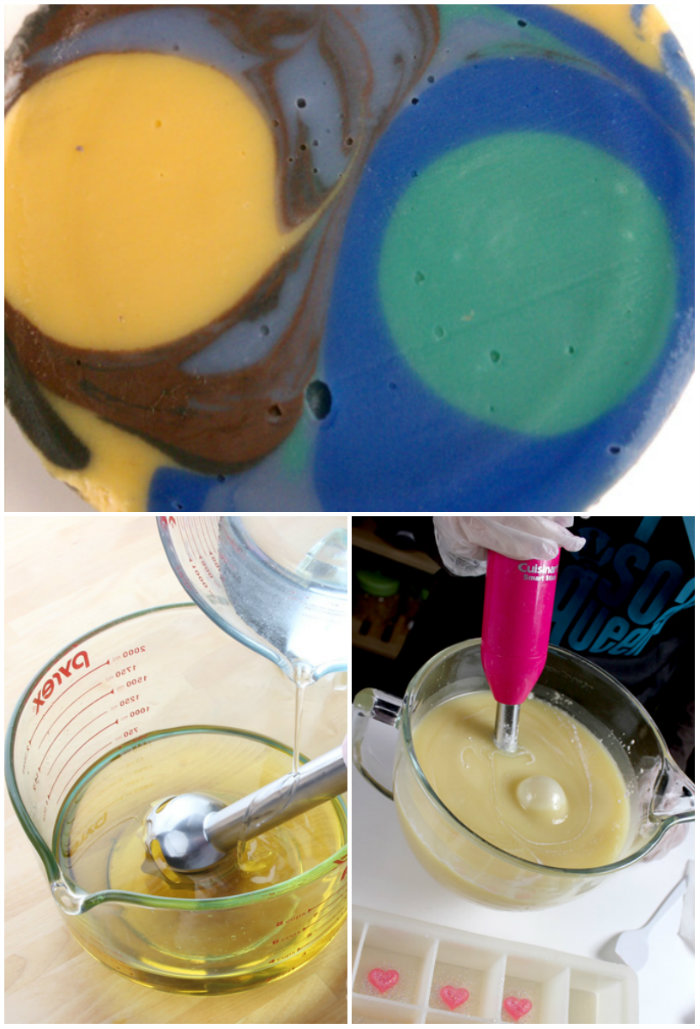
How to Fix it: Unfortunately there is no way to get rid of air bubbles once the soap has been made, other than rebatching or using the hot process hero technique. Luckily, air bubbles are easy to avoid. Pour the lye water over the head of the stick blender to eliminate splashes that can occur. When inserting the stick blender into the oils, “burp” the stick blender by tapping the blender on the bottom of your container. Continue to burp the stick blender each time it is inserted into the soap batter (shown above). Once the soap has been poured into the mold, tap the mold firmly on the counter to release more bubbles that may be in the batter.
Glycerin Rivers
Glycerin rivers can occur when glycerin within cold process soap gets too hot and congeals. This causes the glycerin to form “rivers” or ribbons of glycerin within the soap. Glycerin rivers are slightly transparent and clear. Glycerin rivers are more likely to occur in soap containing oxides, particularly Titanium Dioxide. To learn more about glycerin rivers and how to avoid them, check out this blog post.
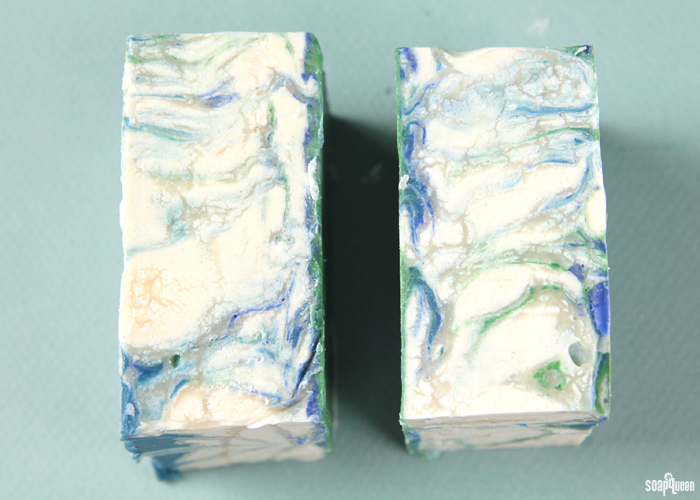 Glycerin rivers are all throughout this soap, which was made with titanium dioxide and high temperatures.
How to Fix it: The good news is that glycerin rivers are only cosmetic, and do not effect the quality of soap. To avoid glycerin rivers, decrease your soaping temperatures and/or also decrease the water amount in your soap. Placing the soap into the fridge or freezer to prevent gel phase also prevents glycerin rivers.
Crumbly Soap
Soap with a dry, crumbly texture could be caused by too much lye in your recipe. If your soap has a crumbly texture, ensure it is not lye heavy. If the pH is safe to use, the crumbly texture could also be caused by soaping with cool temperatures. Soaping cool (100 °F or below) can increase the chance of soda ash. Soda ash normally occurs on the top of the soap. If soda ash is deep within the bar, it can cause a crumbly texture. Another cause of crumbly soap is the separation of stearic acids within oils, especially palm oil.
How to Fix it: Soaping around 120°F or above will help decrease the chances of deep soda ash within your bar. To avoid the seperation of stearic fatty acids, be sure to melt down the complete container of palm oil before adding it to your soap. Like all oils, palm oil is made up of various fatty acids. These fatty acids melt and different temperatures. When a portion of palm oil is melted, it may not contain all the necessary fatty acids that your soap requires. The heat resistant plastic bags make melting your palm oil easy; check out this blog post for tips on how to boil the bags as well.
Soda Ash
Soda ash is caused by teensy amounts of unsaponified lye coming in contact with carbon dioxide in the air. While harmless, soda ash causes a layer of white on the top of the soap. Soda ash is an aesthetic issue that is most commonly caused by temperature. To read more about what causes soda ash and remove it, check out this blog post.
How to Fix it: Luckily, soda ash is easy to remove. Steaming the top of the soap is an extremely effective way of removing soda ash. In addition, you can use cold water to simply “wash” the soda ash off (click here to learn how). To prevent soda ash, increase the temperature of your lye and oils to 120°F-140°F. Forcing soap into gel phase is a great way to prevent soda ash! Doing a slight water discount in your recipe, and spraying the top of newly made soap with 99% isopropyl alcohol every 15-20 minutes for the first hour also prevents soda ash.
DOS (Dreaded Orange Spots)
Dreaded orange spots, aka: DOS, is usually caused by rancid oils or butters in your soap. DOS usually appears a few weeks or months after the soap is made. DOS looks exactly like it sounds…orange or rust colored spots on your soap. These spots can appear in one area of the soap, or all over. Soap with DOS my also develop an unpleasant odor.
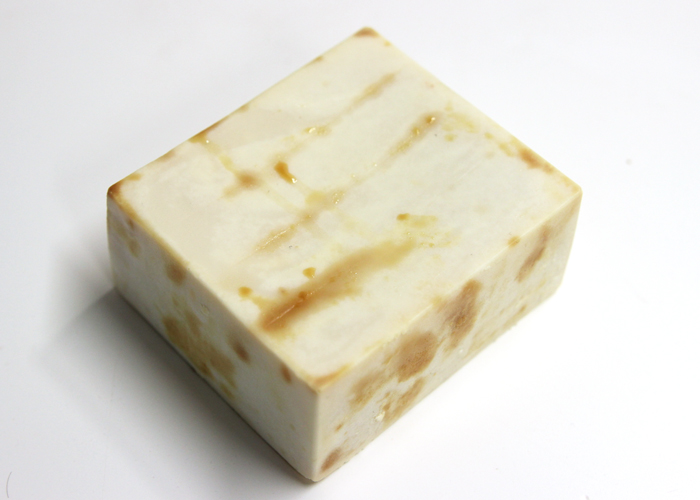 Dreaded orange spots can appear all over the soap, as shown above.
How to Fix it: Soap with DOS is not unsafe to use, but may look or smell unpleasant. To avoid DOS, be sure to use fresh oils and butters. If you are curious about the shelf life of common soapmaking oils, check out this blog post. Place your oils and butters into the freezer to extend the shelf life. Soap with high superfat of 5% or more is more likely to develop DOS, as is soap in a high humidity climate. Click here to learn more about how to prevent DOS.
Is there a soapy mess up that you’d like more clarification on? I would be happy to write up a blog post about it! Check out the blog posts below for more information about soapy mess
ups and how to prevent them:
Formulating Cold Process Soap Recipes
Dealing with Dreaded Orange Spots
The River Runs Deep: An Explanation of Glycerin Rivers
Soap Behaving Badly
All Olive Oils Are Not Created Equal
Explaining and Preventing Soda Ash
“Why Did my Soap Turn Brown?”
Hot Process Hero
Augh! What’s That All Over My Soap? (Glycerin Dew)
If at First You Don’t Succeed, Soap Soap Again!

