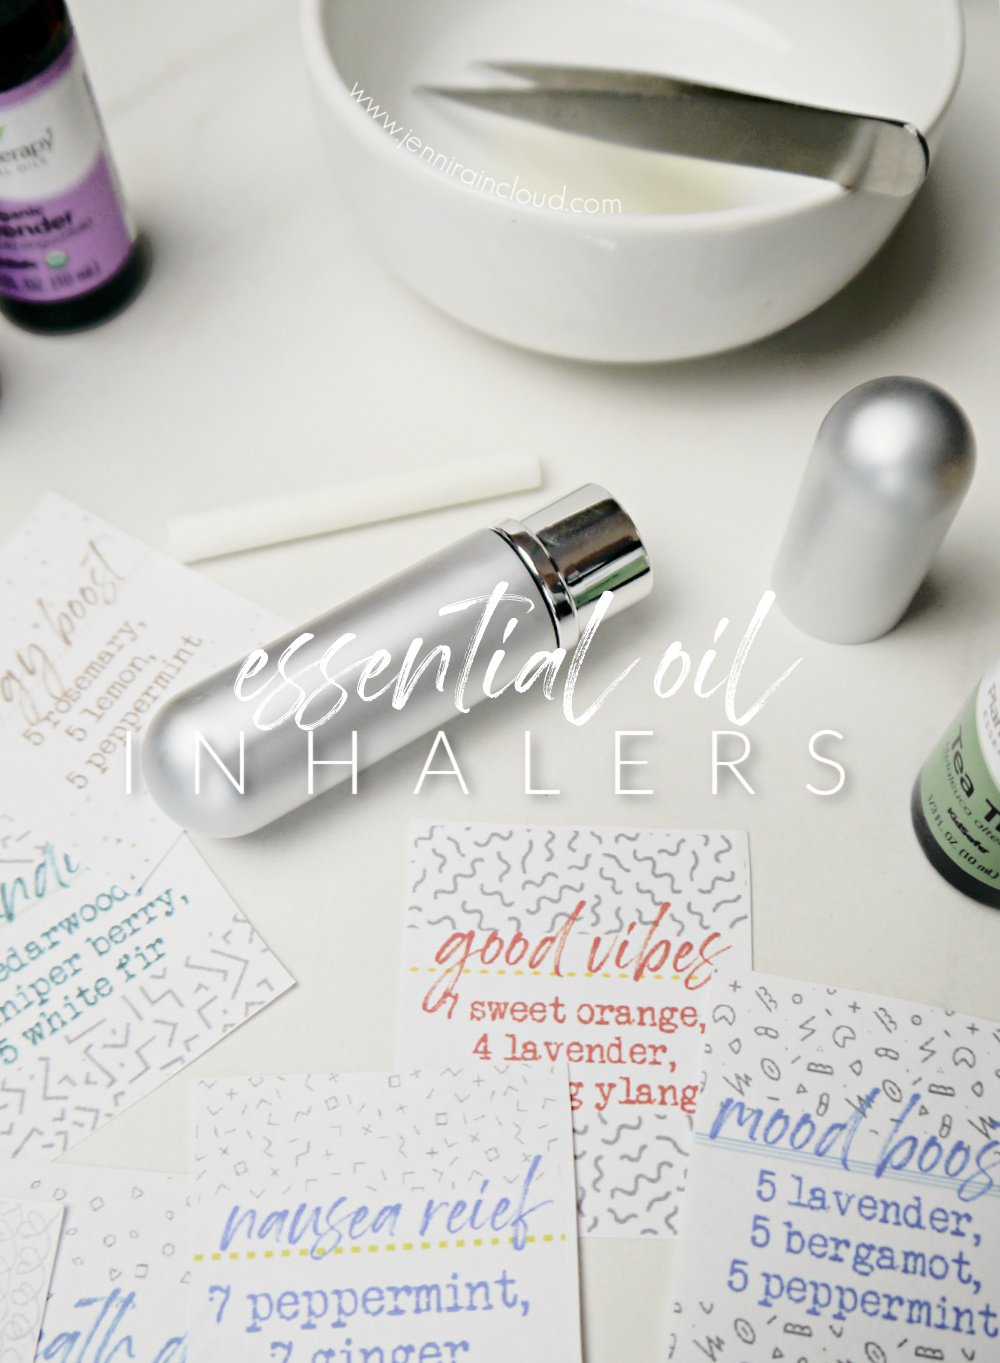
Incorporating essential oil inhalers into your health routine can be a complete game changer. Using an inhaler can help decongest, improve focus, boost the immune system and relieve anxiety and depression. They take minutes to make and can be used absolutely everywhere! Using a personal aromatherapy inhaler is the easiest way to experience the power of essential oils. I’ve got 12 inhaler recipes plus matching printable labels for each! From headaches to sleep issues, I’ve got an inhaler recipe to cover it!
Inhaling essential oils is one of the best ways to enjoy the many therapeutic benefits these oils hold. In a previous post, diffusing was explored and probably is the most popular way to inhale essential oils. An essential oil diffuser is a great way to fill the air with essential oils. However, if you have sensitive people in your home or are concerned about your cats, a portable inhaler might be the perfect alternative!
Today, let’s explore the essential oil inhaler. I think you’ll find it incredibly convenient, affordable and effective!
Related Post: You might be interested in learning how to make and use Essential Oil jewelry!
What is an Essential Oil Inhaler?
An essential oil inhaler looks a lot like a tube of lipstick. Inside of the inhaler is a cotton wick or cotton pad where you add drops of essential oil. Inhalers are a convenient way to make therapeutic essential oil blends so that you can experience on-the-go benefits of aromatherapy. It only takes 10-15 drops of oil to experience relief from brain fog, depression, focus issues, a stuffy nose, seasonal allergies, headaches and anxiety. Even medical conditions such as high blood pressure and respiratory issues may be improved by inhaling pure essential oils.
Inhalers come in stainless steel or plastic. Some have a glass receptacle you add the cotton wick to and some are more simple where you add the wick to the inhaler itself. Once you add drops of therapeutic grade oils, you can then use them any time, any where. Unlike diffusing, using an inhaler can be used with zero prep and does not require batteries or a plug in.
When choosing which inhaler is best for you, you might be tempted to go with the cheaper plastic version. The plastic inhalers work great but I find that it is next to impossible to get the cap off to refill once it’s time to re-make it.
I use THESE inhalers. You can find plastic inhalers HERE.
Benefits of Using an Inhaler:
- They are effective. Inhalation is one of the most effective ways you can reap the benefits of essential oils!
- They are extremely portable. There is no worry of spilling. They are light weight and can be thrown in a bag or even tucked in a pocket.
- They are economical. Since inhalers only require 15 drops and can last for over a month, you get the maximum use out of your oils!
- They don’t effect others around you. Unlike diffusing or even pulling out a bottle of essential oil, people near you will not be able to smell your inhaler.
The Best Essential Oils for Inhalers:
Related Post: If you’re new to essential oils, you might like to read my Beginner’s Guide to Essential Oils.
How to Prepare an Inhaler:
Your inhaler should have 4 separate parts.
- Place the cotton wick in a small bowl.
- Add 10-15 drops of essential oils to the bowl and allow the wick to soak up the oils.
- You can use tweezers to push the wick into the oils for more soaking.
- Add the wick to the diffuser with the tweezers and replace the lid.
Preparation Notes:
- Depending on your inhaler, you can put your wick where it goes and add oils straight into the inhaler. I don’t believe this way saturates the wick as thoroughly though.
- Inhalers typically last about a month. You’ll want to replace the cotton wick and essential oils once you notice the scent isn’t strong.
- 15 drops is standard for inhalers. I find that I prefer mine a bit stronger. My recipes were either my own or ones I found around the web. They are formulated for the standard 15 drops per inhaler. You can always make my recipes and then if you find it doesn’t smell as strong as you’d like, add a few more drops!
How to Use an Inhaler:
You can use your inhaler all through out the day and night. Simply remove the lid and hold the top of the inhaler under your nose and take a deep breath in through the nose and out through the mouth. Repeat this for 1-2 minutes.
Pro Tip: Leave the bowl you used to mix your recipe on the counter for a few days and enjoy the aromatherapy!
My Favorite Essential Oil Blends:
I suffer from seasonal allergies so I like to keep my allergy inhaler with me at all times. I keep an inhaler next to my bed to inhale before bed time to help me sleep and I keep another inhaler on hand to relieve stress and anxiety. Tough seasons happen and with that can come panic attacks and moments of feeling overwhelmed. Being able to grab my inhaler helps me to stop and breath. The breath alone is a life saver but add in essential oils known to calm is so helpful.
Breath Deep
This blend is perfect for respiratory issues and congestion. Pregnant women and children under 10 should omit eucalyptus and rosemary.
- 5 drops peppermint
- 5 drops eucalyptus
- 2 drops rosemary
- 2 drops lavender
- 2 drops lemon
Seasonal Allergy/Hay Fever Blend
If you suffer from seasonal allergies, this blend is a lifesaver. You might also find this Allergy Relief Balm helpful and I wrote a post on Allergy Season Must Haves!
- 5 drops lavender
- 5 drops lemon
- 5 drops peppermint
Panic Reset
I keep this inhaler ready to go and close for panic attacks, feelings of being overwhelmed and general anxiety.
- 5 drops lavender
- 4 drops bergamot
- 3 drops Roman chamomile
- 3 drops ylang ylang
Energy Boost
I grab this inhaler during that midday slump!
- 5 drops rosemary
- 5 drops lemon
- 5 drops peppermint
Feel Better
This exact recipe comes from Andrea from the Aromahead Institute. It is meant to be used in the morning when you feel like you are getting sick or when you are already sick. It is a lovely scent that gives you a boost when you’re feeling bad.
- 5 drops lime
- 5 drops tea tree
- 3 drops lavender
- 2 drops peppermint
Sleep Potion
I keep this inhaler by my bed and use before bed and if I wake up in the middle of the night.
- 6 drops lavender
- 5 drops cedarwood
- 4 drops clary sage
Open Heart
This blend is for you if you have trouble connecting emotionally and intimately. These oils are said to open your heart to receive love.
- 6 drops lavender
- 4 drops geranium
- 2 drops ylang ylang
Mood Boost
- 5 drops lavender
- 5 drops bergamot
- 5 drops peppermint
Headache Relief
I make this inhaler and keep it in my bag. It goes everywhere I go just in case!
- 5 drops rosemary
- 5 drops peppermint
- 5 drops lemon
Nausea Relief
This blend is perfect for morning sickness, motion sickness and the stomach bug.
- 7 drops peppermint
- 7 drops ginger
Good Vibes
- 7 drops sweet orange
- 4 drops lavender
- 4 drops ylang ylang
Grounding
This blend is excellent when you feel overwhelmed and untethered. It is calming yet centering.
- 5 drops cedarwood
- 5 drops juniper berry
- 5 drops white fir
Free Printable Labels!
Find my printable “labels” HERE. Download my labels to your computer and print!
I decided to try something a little easier than a sticky label. Honestly, I didn’t want to fiddle with figuring out the exact right size and then buying more labels! Plus, inhalers vary in size so it makes more sense to not mess with actual labels.
My PDF is for you to cut out the label you need and adhere it to your inhaler using clear packing tape. This way you don’t need to buy labels but you can still properly label your inhaler with a cute label!
I even included the recipe on each label so you can refill your inhaler easily!
Where to Find the Best Essential Oils:
I get most of my oils from Plant Therapy. I like them because of their free, fast shipping, affordable prices, organic, high quality oils and huge variety. I also love Mountain Rose Herbs essential oils as well.
Aromatherapy Inhalers and Children:
So many kids these days are dealing with substantial issues such as ADHD, depression and anxiety just to name a few. In fact, my youngest daughter has been diagnosed with ADHD and struggles to stay focused in class. Because inhalers are small, leak proof and won’t bother other children, they are the perfect tool to try!
Plant Therapy has some incredible blends for children including Hocus Focus, Nighty Night, Sniffle Stopper and Happy Place. Each of these blends comes in roll on form but they also come in a dropper bottle that can easily be used to make the perfect personal inhaler for your child.
As you can see, incorporating essential oil inhalers into your aromatherapy routine is a great option, especially if you work in an office, classroom or are always on the go. Making your own essential oil inhaler takes seconds and is so easy to use. I believe using an inhaler to experience the aroma of the oils has a stronger effect on the issue you are trying to target than diffusing.
Which blend are you planning to make? Do you have your own blend you love? Please share in the comments!
xx, Jenni


